

Integrating CKEditor 5 with Salesforce from CDN
Salesforce is a cloud-based Customer Relationship Management (CRM) platform that enables organizations to manage customer interactions, sales processes, and business operations. The platform supports custom development through its Lightning Platform (formerly Force.com), allowing developers to create custom objects, fields, pages, and components. While CKEditor 5 does not support Shadow DOM yet, which is required by Lightning modules, it can be integrated into Salesforce using Visualforce pages. This integration approach enables rich text editing capabilities within Salesforce applications.
CKEditor 5 Builder
In our interactive Builder you can quickly get a taste of CKEditor 5. It offers an easy-to-use user interface to help you configure, preview, and download the editor suited to your needs. You can easily select:
- The editor type.
- The features you need.
- Preferred framework (React, Angular, Vue or Vanilla JS).
- Preferred distribution method.
At the end you get ready-to-use code tailored to your needs!
# Prerequisites
This section assumes you are working within the Salesforce development platform. We will guide you through creating a new Visualforce page that incorporates CKEditor 5. Visualforce pages provide a way to create custom user interfaces in Salesforce using a markup language similar to HTML, making it an ideal solution for integrating third-party components like CKEditor 5.
# Creating a Visualforce page
The Visualforce page with CKEditor 5 will be displayed in an iframe after embedding it in your Lightning page.
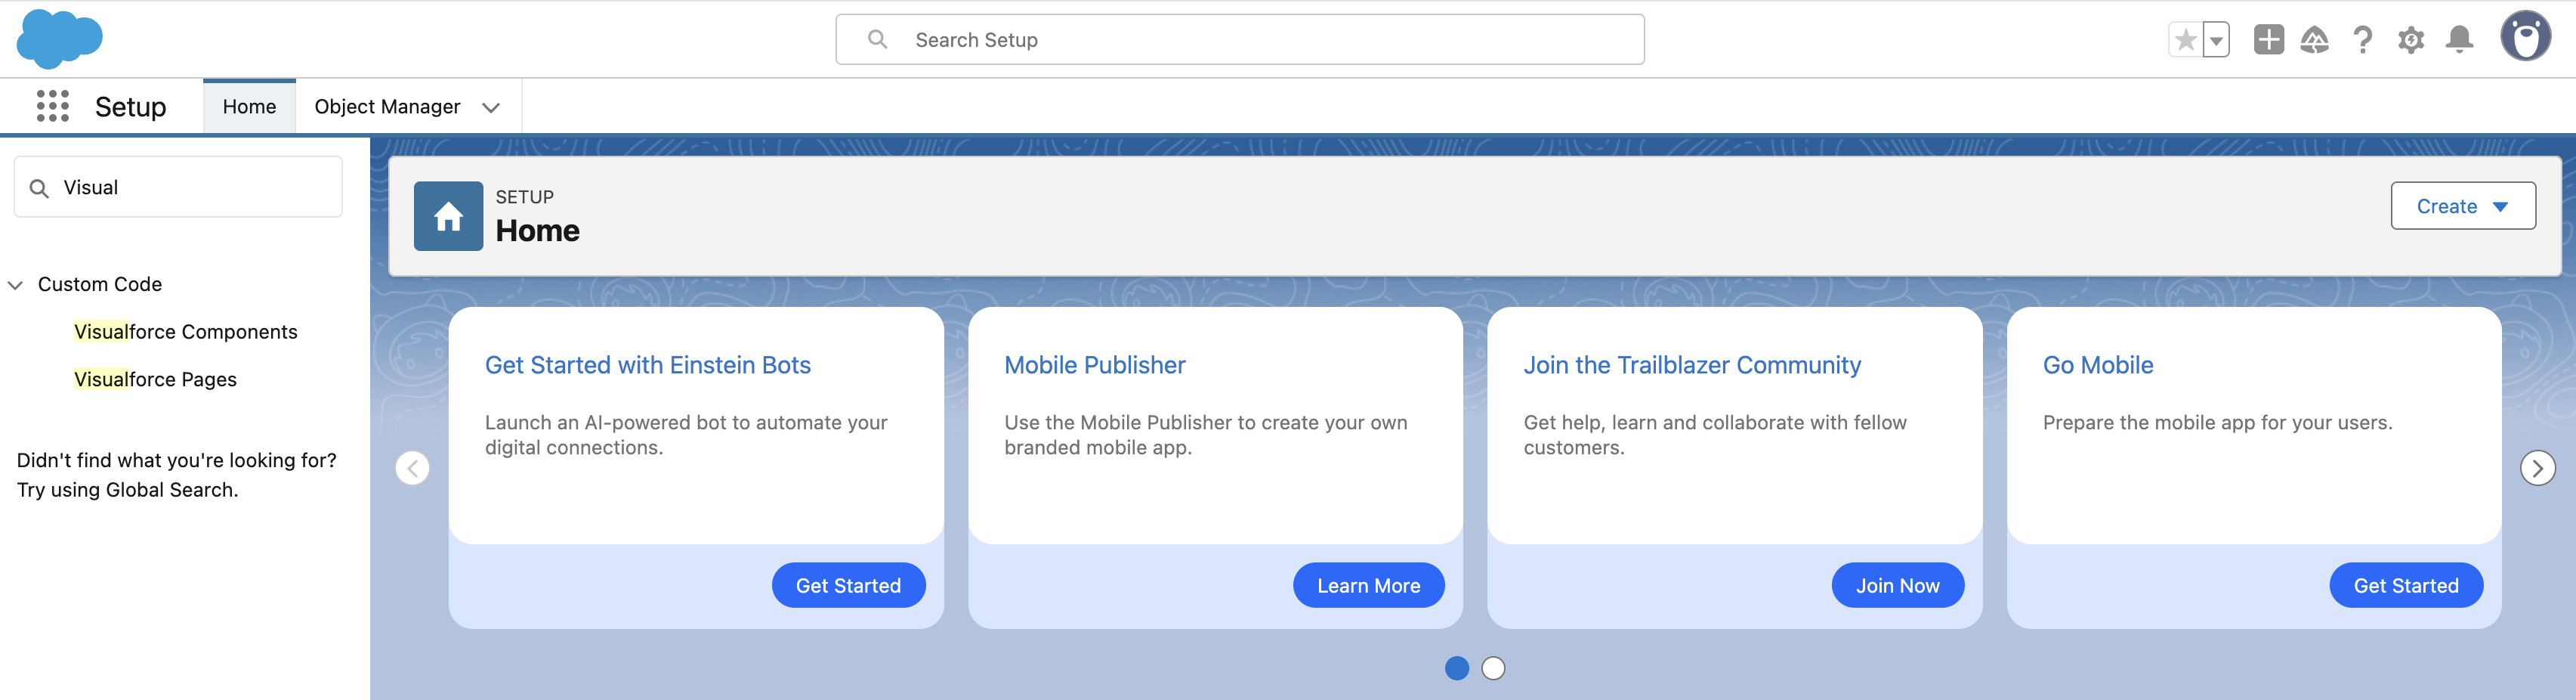
To start the integration, you need to create a new Visualforce page that will be used for the CKEditor 5 integration. Navigate to the Setup page of your development platform and use the search input to find Visualforce pages.
Enter the Visualforce pages tab and add a new page by clicking the New button. You should see a form that allows adding new pages, along with a code editor containing the default page markup.
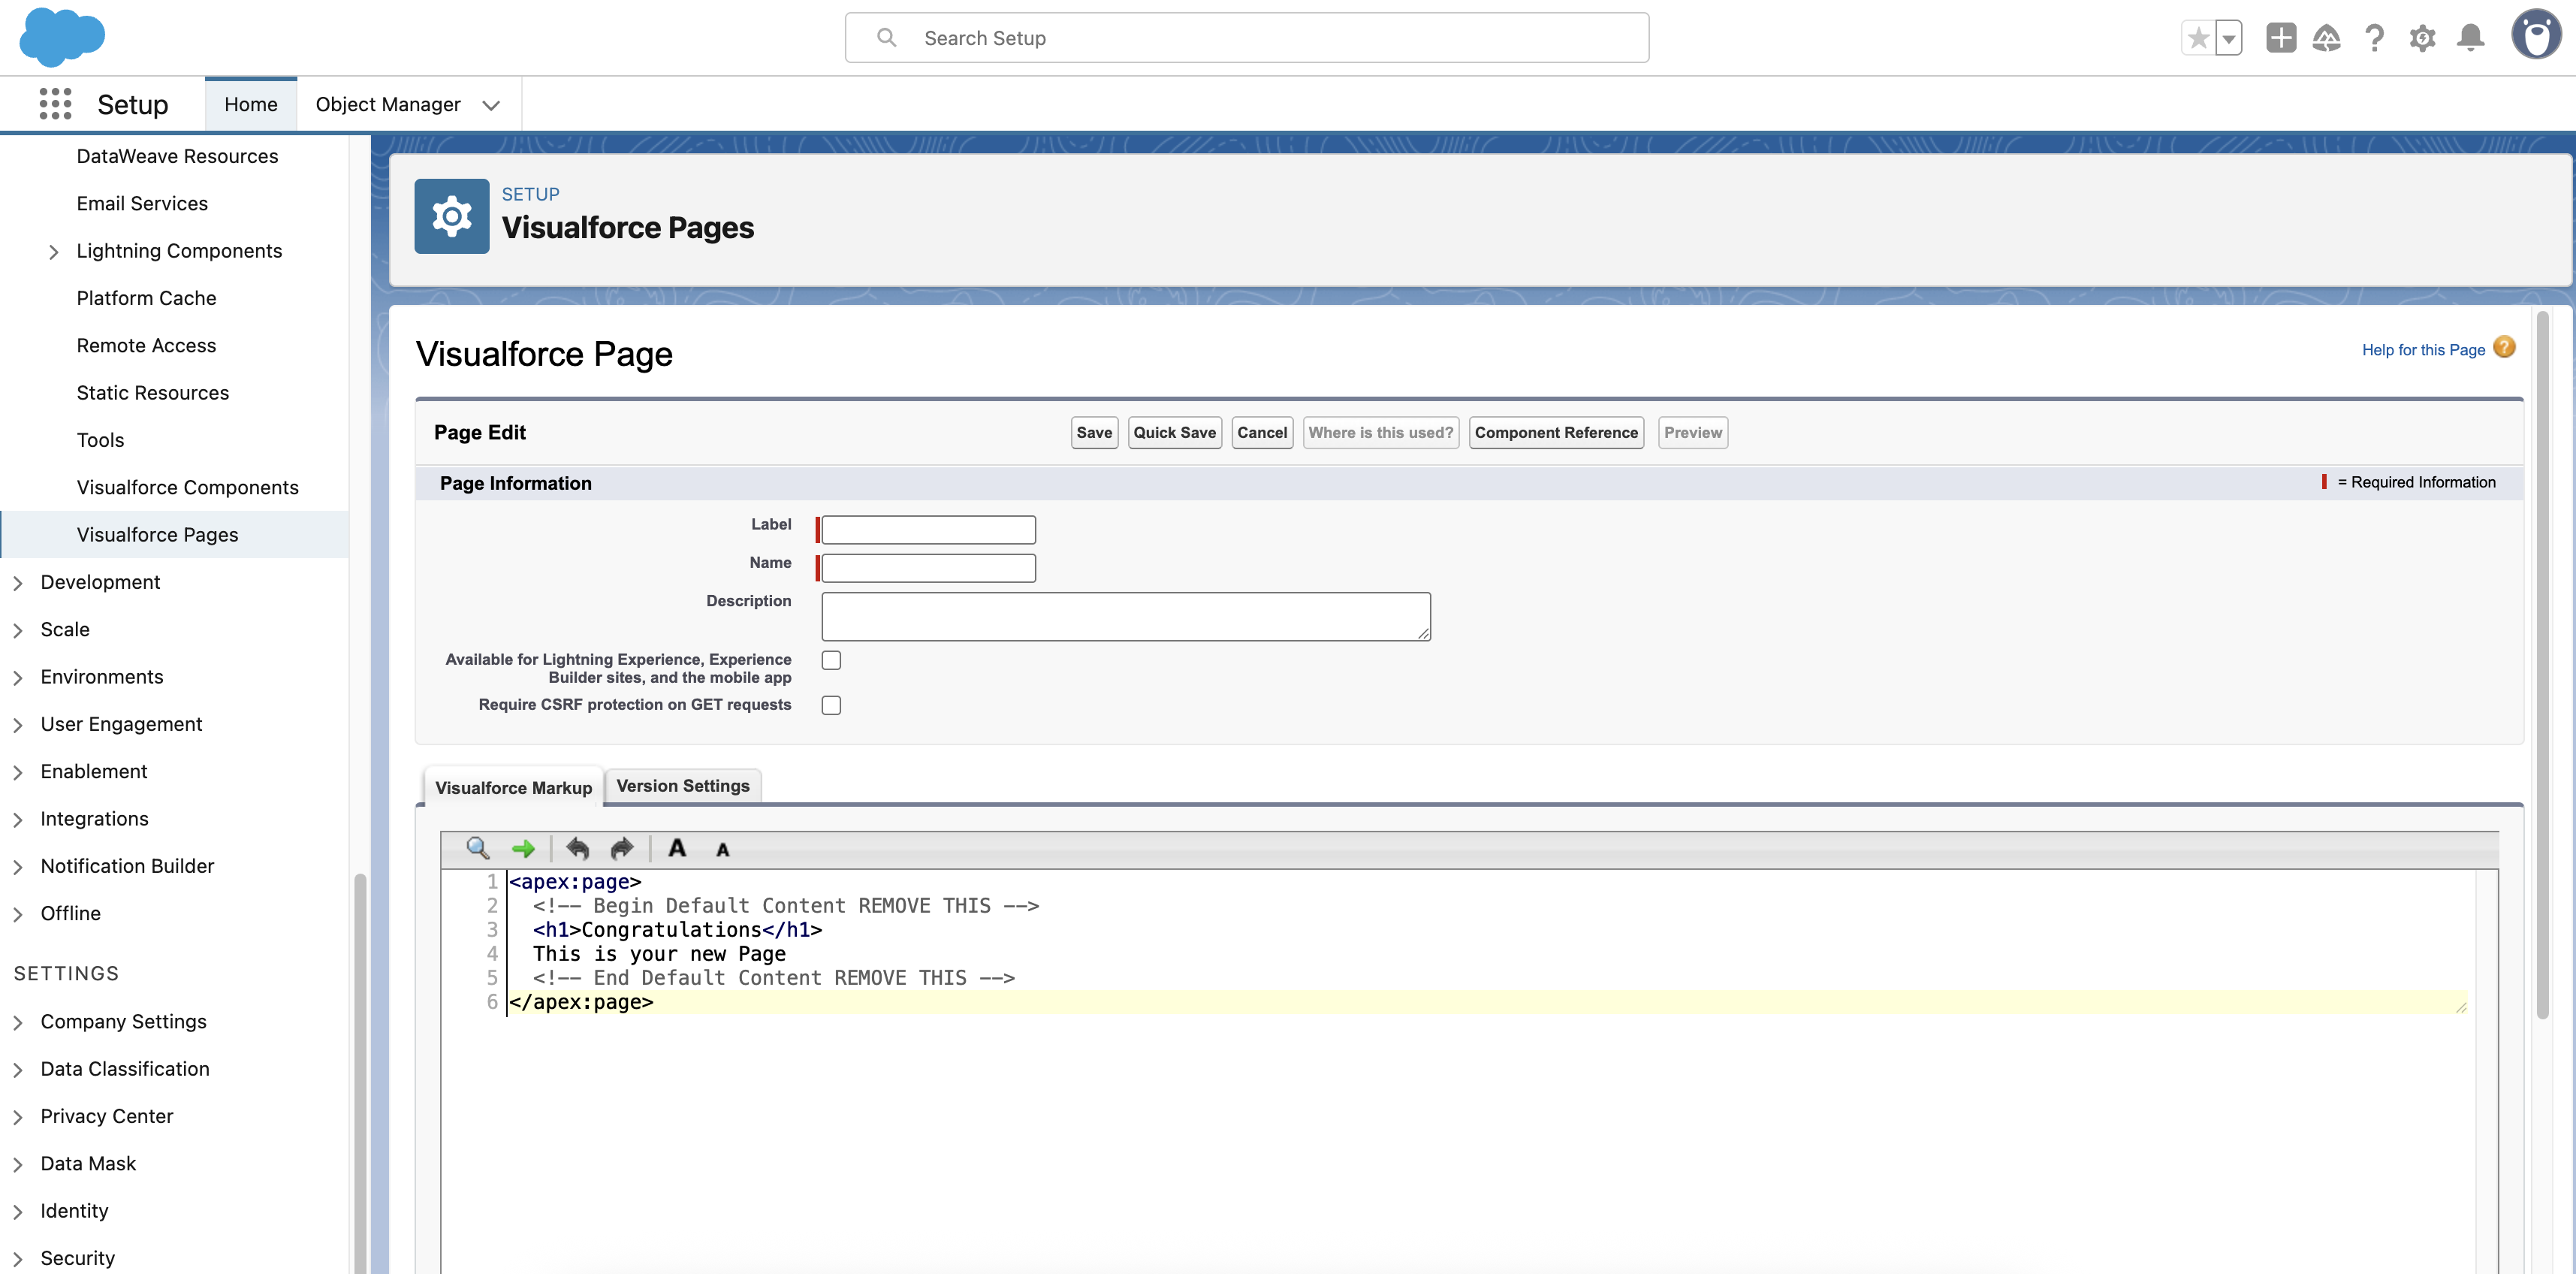
Fill out the required fields in the form, check the Available for Lightning Experience, Experience Builder sites, and the mobile app checkbox, then save the page. You are now ready to integrate the editor.
# Integrating CKEditor 5 in Visualforce page using CDN
# Setting up the page structure
Visualforce pages use a markup language similar to HTML, but with special tags prefixed with apex:. Every Visualforce page must be wrapped in an <apex:page> tag, which serves as the root element. This tag can include various attributes to control the page’s behavior, such as docType, showHeader, and standardStylesheets. Inside this wrapper, you can use standard HTML elements along with Visualforce-specific components to build your page layout and functionality.
For our CKEditor 5 integration, we will use a basic page structure that includes necessary JavaScript and CSS resources, along with a container for the editor. The page markup will look similar to this:
<apex:page showHeader="false" standardStylesheets="false" docType="html-5.0">
    <head>
        <!-- Resources will be added here -->
    </head>
    <body>
        <!-- Editor container will be added here -->
    </body>
</apex:page>
# Adding CKEditor 5 resources
To use our Cloud CDN services, create a free account. Learn more about license key activation.
We will start from adding resources required for running CKEditor 5 (CSS and JavaScript) to the <head> tag. However, before we do it, make sure to add https://cdn.ckeditor.com domain to Trusted URLs:
<apex:page showHeader="false" standardStylesheets="false" docType="html-5.0">
    <head>
        <!-- Load your editor's JavaScript and CSS from the CDN -->
        <script src="https://cdn.ckeditor.com/ckeditor5/45.2.1/ckeditor5.umd.js"></script>
        <link rel="stylesheet" href="https://cdn.ckeditor.com/ckeditor5/45.2.1/ckeditor5.css" />

        <!-- Add if you use premium features. -->
        <link rel="stylesheet" href="https://cdn.ckeditor.com/ckeditor5-premium-features/45.2.1/ckeditor5-premium-features.css" />
        <script src="https://cdn.ckeditor.com/ckeditor5-premium-features/45.2.1/ckeditor5-premium-features.umd.js"></script>
    </head>
    <body>
        <!-- Editor container will be added here -->
    </body>
</apex:page>
# Initializing the editor
Now, we can add the container that will hold our editor and introduce an initialization script with the basic editor configuration:
<apex:page showHeader="false" standardStylesheets="false" docType="html-5.0">
    <head>
        <!-- JavaScript and CSS resources-->
    </head>
    <body>
        <!-- Editor container -->
         <div id="editor" style="min-height: 300px; border: 1px solid #ccc;"></div>

         <!-- Initialization script -->
          <script>
            const {
                ClassicEditor,
                Essentials,
                Bold,
                Italic,
                Font,
                Paragraph
            } = CKEDITOR;
            const { FormatPainter } = CKEDITOR_PREMIUM_FEATURES;

            ClassicEditor
                .create( document.querySelector( '#editor' ), {
                    licenseKey: '<YOUR_LICENSE_KEY>',
                    plugins: [ Essentials, Bold, Italic, Font, Paragraph, FormatPainter ],
                    toolbar: [
                        'undo', 'redo', '|', 'bold', 'italic', '|',
                        'fontSize', 'fontFamily', 'fontColor', 'fontBackgroundColor', '|',
                        'formatPainter'
                    ]
                } )
                .then( /* ... */ )
                .catch( /* ... */ );
       </script>
    </body>
</apex:page>
# Complete integration code
Putting everything together, the full integration code looks as follows (remember to insert your license key in the editor configuration):
<apex:page showHeader="false" standardStylesheets="false" docType="html-5.0">
<head>
<!-- Load your editor's JavaScript and CSS from the CDN -->
<script src="https://cdn.ckeditor.com/ckeditor5/45.2.1/ckeditor5.umd.js"></script>
<link rel="stylesheet" href="https://cdn.ckeditor.com/ckeditor5/45.2.1/ckeditor5.css" />
<!-- Add if you use premium features. -->
<link rel="stylesheet" href="https://cdn.ckeditor.com/ckeditor5-premium-features/45.2.1/ckeditor5-premium-features.css" />
<script src="https://cdn.ckeditor.com/ckeditor5-premium-features/45.2.1/ckeditor5-premium-features.umd.js"></script>
</head>
<body>
<!-- Editor container -->
<div id="editor" style="min-height: 300px; border: 1px solid #ccc;">CKEditor 5 integration with Salesforce.</div>
<!-- Initialization script -->
<script>
const {
ClassicEditor,
Essentials,
Bold,
Italic,
Font,
Paragraph
} = CKEDITOR;
const { FormatPainter } = CKEDITOR_PREMIUM_FEATURES;
ClassicEditor
.create( document.querySelector( '#editor' ), {
licenseKey: '<YOUR_LICENSE_KEY>',
plugins: [ Essentials, Bold, Italic, Font, Paragraph, FormatPainter ],
toolbar: [
'undo', 'redo', '|', 'bold', 'italic', '|',
'fontSize', 'fontFamily', 'fontColor', 'fontBackgroundColor', '|',
'formatPainter'
]
} )
.then( /* ... */ )
.catch( /* ... */ );
</script>
</body>
</apex:page>
Now, you can save your component and click the Preview button to see it live. A new page should open in your browser, and you should see the CKEditor 5 instance:

# Using CKEditor 5 Visualforce component in Lightning page
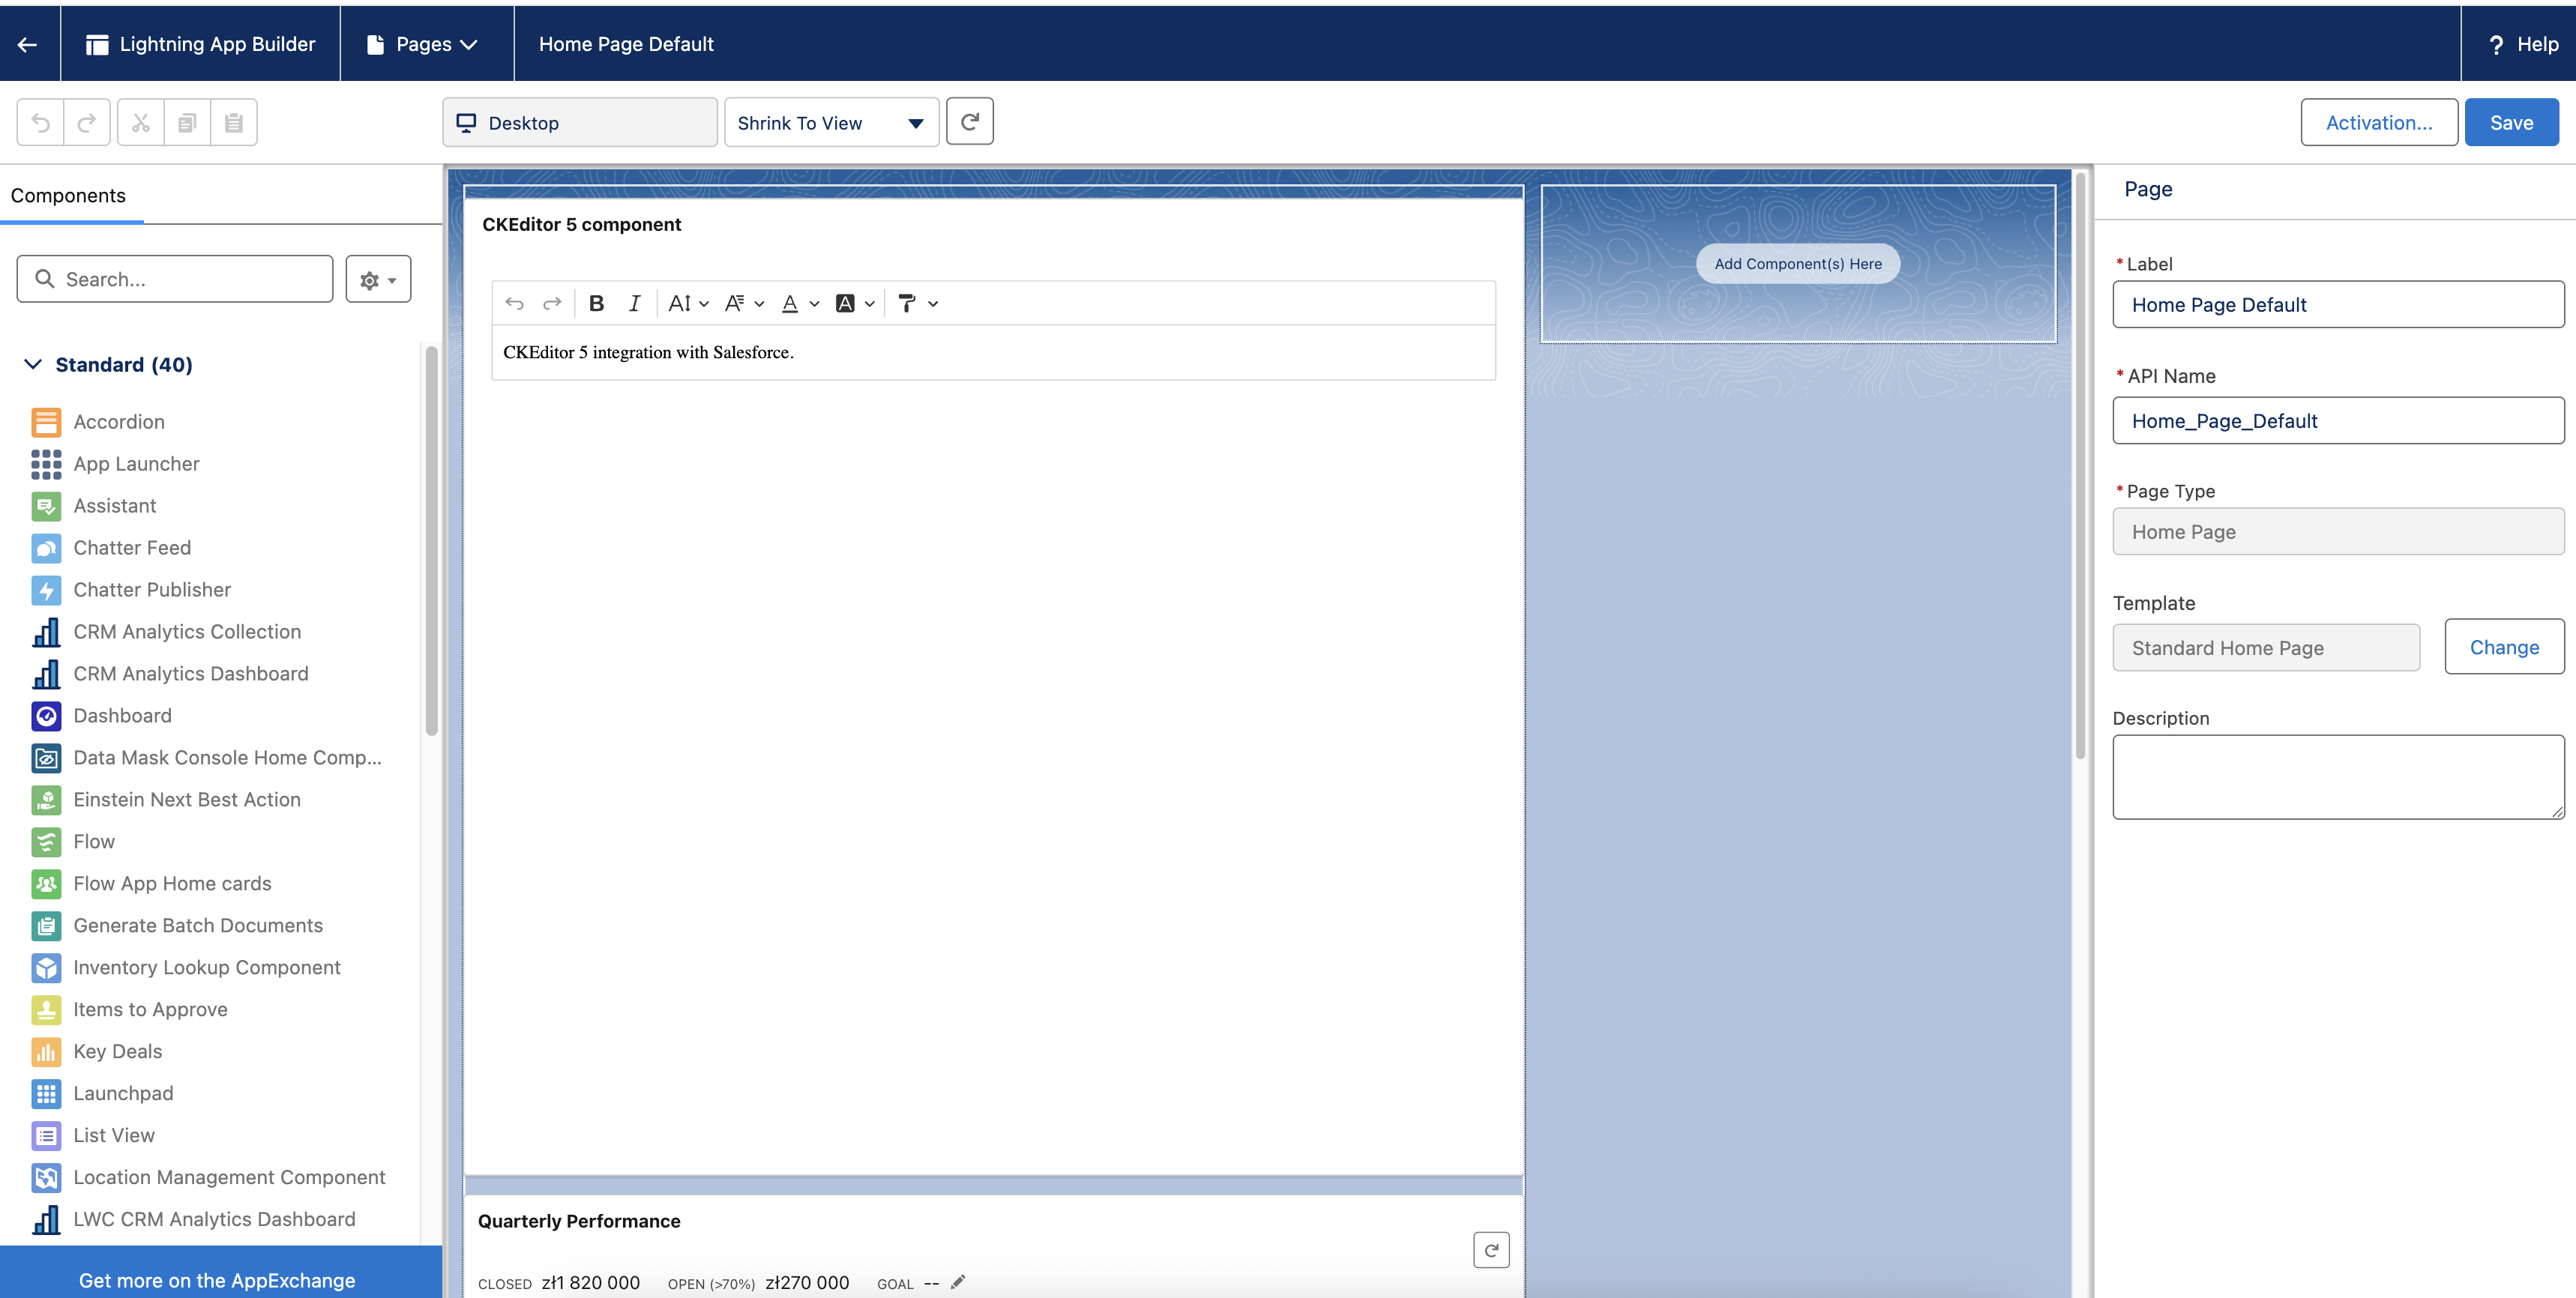
Now that we have created our CKEditor 5 Visualforce page, we can embed it into a Lightning page. This process involves adding the Visualforce page as a component within your Lightning page layout. To do this, navigate to the Lightning App Builder, where you can drag and drop the Visualforce page component onto your desired location in the page layout. The editor will be displayed within an iframe, maintaining its full functionality while being seamlessly integrated into your Lightning page.
Let’s go through the steps to add our CKEditor 5 component to a Lightning page:
To add your CKEditor 5 component to a Lightning page, first navigate to the Lightning App Builder. Once there, either select an existing Lightning page or create a new one where you want to incorporate the editor. Next, locate the Visualforce page component in the components panel and add it to your desired position in the layout. After adding the component, configure its settings and specifically select your CKEditor 5 component from the available options. Finally, save your changes and activate the Lightning page to make it available to users.
You should end up with something similar to this:
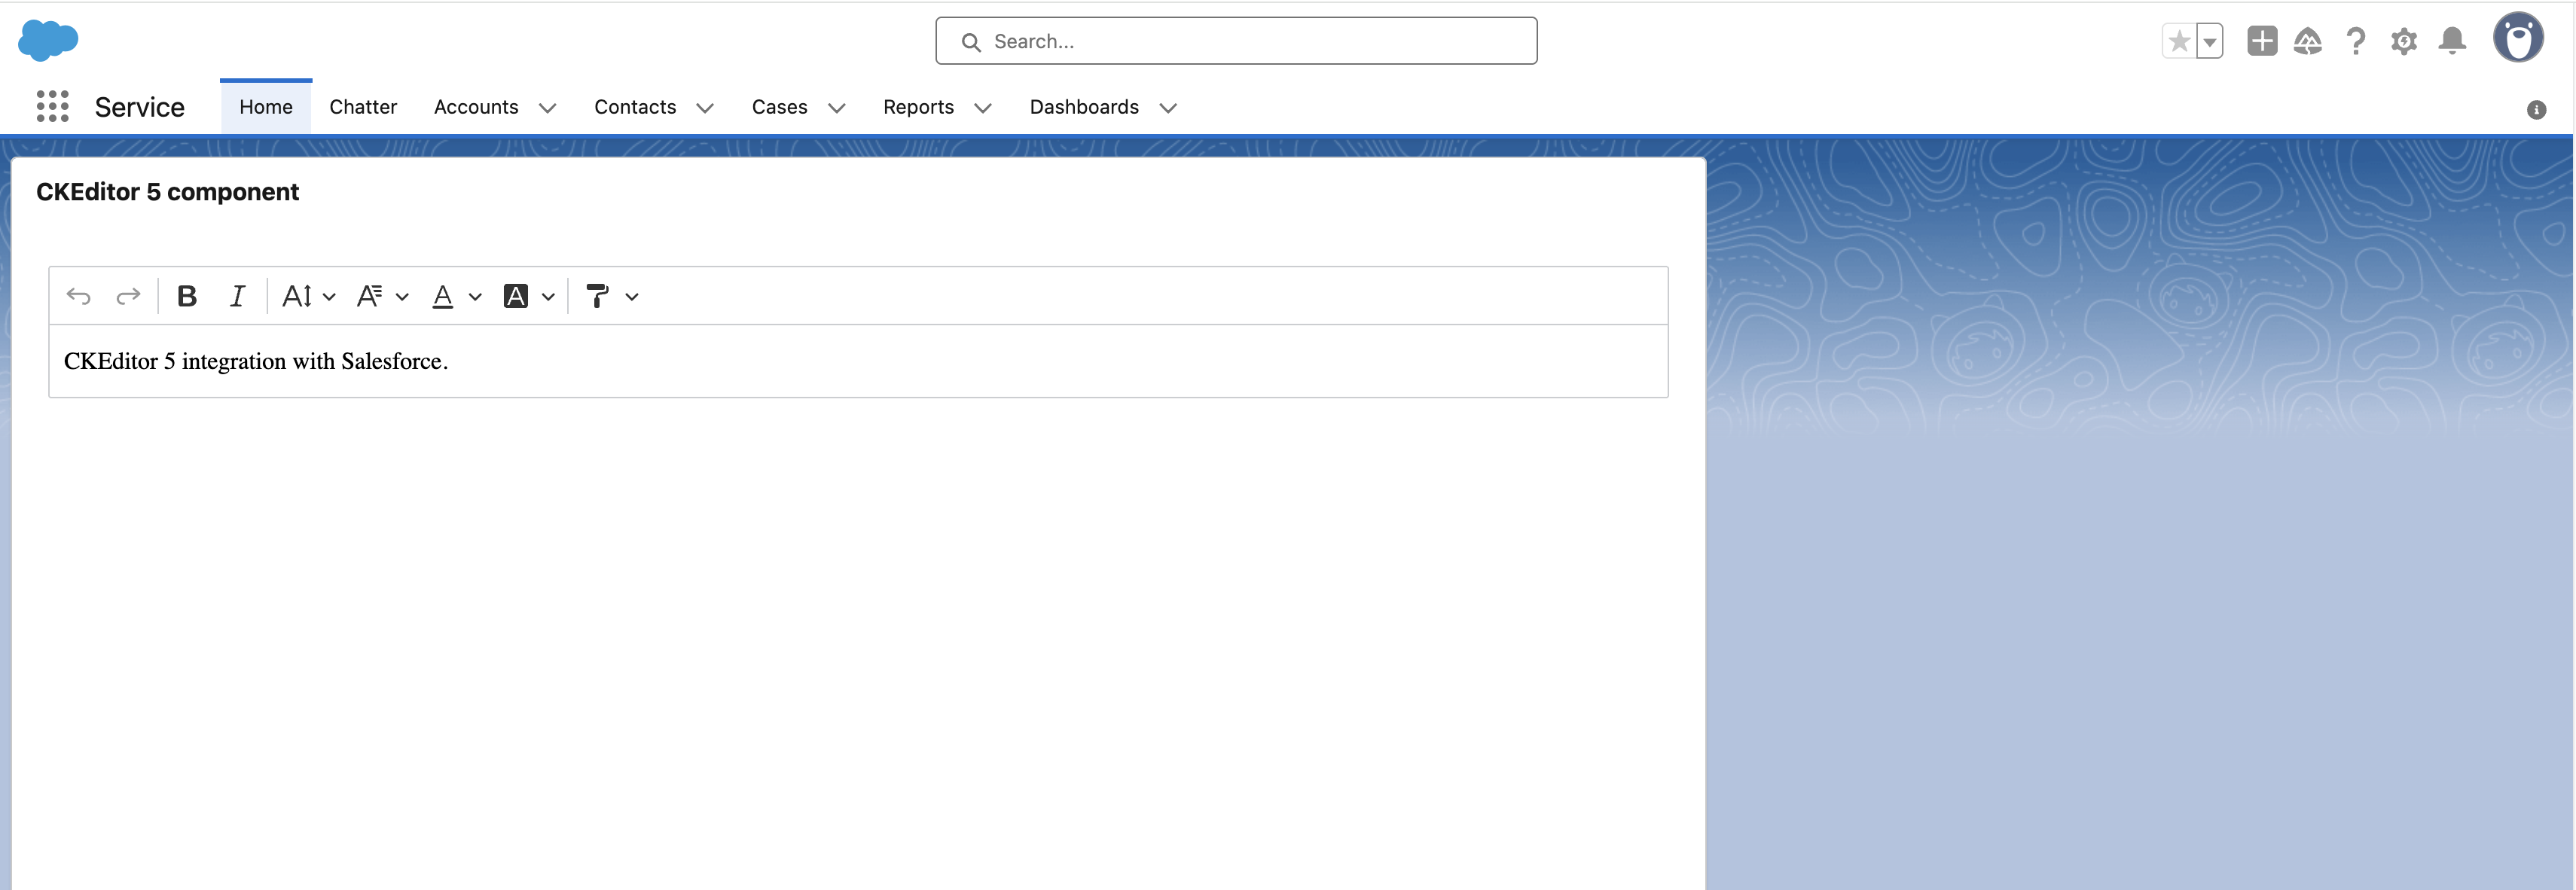
Now, you can view your Lightning page and use your editor:
# Distributing your CKEditor 5 component
To make your CKEditor 5 Visualforce component available to other Salesforce users, you can create a package. This allows you to distribute your component as a standalone solution that can be easily installed in other Salesforce environments.
# Creating a package
To create a package, navigate to the Salesforce Setup page and use the Quick Find box to search for Packages. Click the “New” button to start creating your package. In the package creation form, provide a meaningful name like “CKEditor 5 Integration” and a clear description that explains the purpose of your component. Set the initial version to “1.0” and consider selecting “Managed Package” if you want to maintain control over future updates. This option allows you to push updates to all installations of your package.
# Adding components to the package
After creating the package, you will need to add your CKEditor 5 Visualforce page to it. In the package details page, use the “Add” button to include new components. Select “Visualforce Page” from the component type dropdown and choose your CKEditor 5 Visualforce page from the list. This will include all the necessary code and resources in your package.
# Uploading the package
Once you have added all required components, you can upload your package. The upload process involves choosing whether to make the package public or private. Public packages are visible in the Salesforce AppExchange, while private packages are only accessible via direct installation links. After selecting the visibility option and accepting the terms and conditions, click Upload to make your package available for distribution.
# Installing the package
After the upload is complete, you will receive an installation URL that looks like this:
https://login.salesforce.com/packaging/installPackage.apexp?p0=04td20000002WVF&isdtp=p1
Users can install your package by logging into their Salesforce account and visiting this URL. The installation process will guide them through granting necessary permissions and configuring the component in their environment.
The package installation requires a production Salesforce account. Users installing the package will need appropriate permissions in their Salesforce environment.
After installation, users can add the CKEditor 5 component to their Lightning pages following the steps described in the Using CKEditor 5 Visualforce component in Lightning page section.
# Next steps
- See how to manipulate the editor’s data in the Getting and setting data guide.
- Refer to further guides in the setup section to see how to customize your editor further.
- Check the features category to learn more about individual features.
Every day, we work hard to keep our documentation complete. Have you spotted outdated information? Is something missing? Please report it via our issue tracker.
With the release of version 42.0.0, we have rewritten much of our documentation to reflect the new import paths and features. We appreciate your feedback to help us ensure its accuracy and completeness.