

Integrating CKEditor 5 with SharePoint SPFx from npm
The SharePoint Framework (SPFx) is Microsoft’s modern, client-side development model for building custom experiences that run in the SharePoint Online, Microsoft Teams, Viva Connections, Outlook, and the Microsoft 365 applications.
# Prerequisites
Before integrating CKEditor 5 with SharePoint, make sure you have the following installed:
- Node.js (LTS version)
- Yeoman generator and SharePoint generator plugin:
npm install -g yo @microsoft/generator-sharepoint
- Gulp (for building the project):
npm install -g gulp
# Creating a new web part project
First, create a new folder and navigate into it:
mkdir my-spfx-app
cd my-spfx-app
Generate a new SPFx web part project:
yo @microsoft/sharepoint
When prompted for:
- Which type of client-side component to create? – choose WebPart
- Which template would you like to use? – choose React
You will be also prompted for names for the application and the web part, for example:

# Running the web part project
After the project is created, go to config/serve.json file and update the initialPage property with your SharePoint tenant URL:
"initialPage": "https://your-tenant.sharepoint.com/_layouts/workbench.aspx"
At this point you should be able to run the project by executing:
gulp serve
A new browser tab with SPFx app should open automatically. You might be prompted to log in to your Microsoft account at this point.
If the page does not open automatically, navigate to the following URL:
https://your-tenant.sharepoint.com/_layouts/workbench.aspx
If everything went fine, you should see a screen similar to this one:

# CKEditor 5 web part integration
# Installing dependencies
Now it is time to add CKEditor 5 to the application. First, install CKEditor 5 and React integration packages:
npm install --save @ckeditor/ckeditor5-react ckeditor5 ckeditor5-premium-features
In tsconfig.json file add:
...
"allowSyntheticDefaultImports": true
...
# Creating CKEditor 5 web part component
Assuming you named your web part “RichTextEditor”, open the src/webparts/richTextEditor/components/RichTextEditor.tsx file and modify it to include CKEditor 5:
import * as React from 'react';
import type { IRichTextEditorProps } from './IRichTextEditorProps';
import { CKEditor } from '@ckeditor/ckeditor5-react';

import {
    ClassicEditor,
    Bold,
    Essentials,
    Italic,
    Paragraph,
    Font,
    Heading,
    Table,
    List,
    TableCellProperties,
    TableProperties,
    TableToolbar,
    Autoformat
} from 'ckeditor5';

import { FormatPainter } from 'ckeditor5-premium-features';

import 'ckeditor5/ckeditor5.css';
import 'ckeditor5-premium-features/ckeditor5-premium-features.css';

export default class RichTextEditor extends React.Component<IRichTextEditorProps> {
    public render(): React.ReactElement<IRichTextEditorProps> {
        return (
                <CKEditor
                        editor={ ClassicEditor }
                        config={ {
                                licenseKey: '<YOUR_LICENSE_KEY>',
                                plugins: [
                                    Bold, Essentials, Italic, Paragraph, Font, Heading,
                                    Table, TableCellProperties, TableProperties, TableToolbar, List,
                                    Autoformat, FormatPainter
                                ],
                                toolbar: [
                                    'undo', 'redo', '|', 'bold', 'italic', '|',
                                    'fontFamily', 'fontSize', 'fontColor', 'fontBackgroundColor', '|',
                                    'formatPainter', 'insertTable', 'bulletedList', 'numberedList'
                                ],
                                initialData: '<p>Hello from CKEditor 5 in SPFX React app!</p>',
                                table: {
                                    contentToolbar: [
                                        'tableColumn', 'tableRow', 'mergeTableCells',
                                        'tableProperties', 'tableCellProperties'
                                    ]
                                }
                        } }
                />
        );
    }
}
Restart the server and then refresh the page.
gulp serve
# Adding the editor web part on page
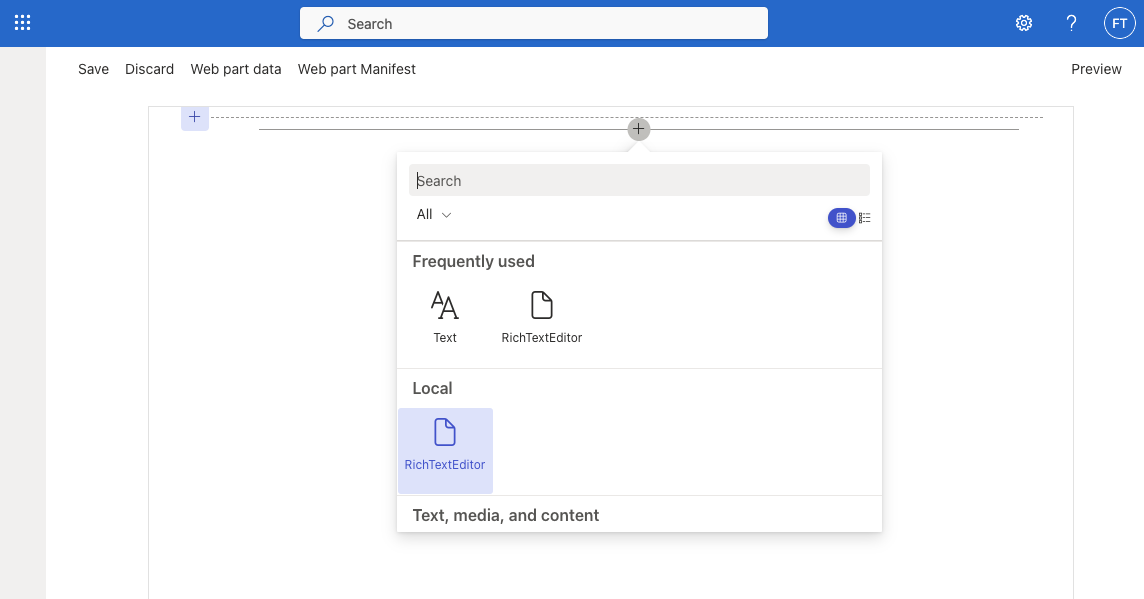
You should be now able to add CKEditor 5 by clicking the plus icon on the main page:

Then choose CKEditor 5 component:
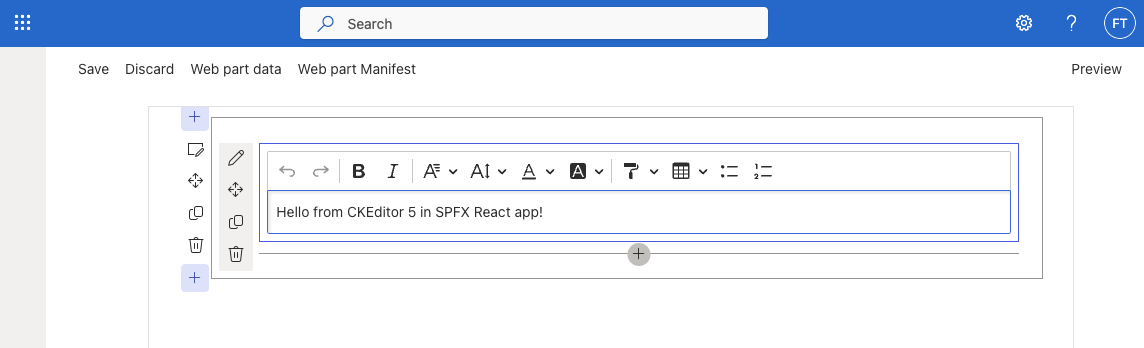
You should now be able to use the editor:
# Additional resources
# Next steps
- See how to manipulate the editor’s data in the Getting and setting data guide.
- Refer to further guides in the setup section to see how to customize your editor further.
- Check the features category to learn more about individual features.
Every day, we work hard to keep our documentation complete. Have you spotted outdated information? Is something missing? Please report it via our issue tracker.
With the release of version 42.0.0, we have rewritten much of our documentation to reflect the new import paths and features. We appreciate your feedback to help us ensure its accuracy and completeness.